1. Install madTrackers Server
- Download the Windows installer from madTrackers_0.3.0_x64-setup.exe (also on the firmware page).
- Before installing: open SteamVR at least once on your account (if you play on PC). If SteamVR is open during installation, the installer will ask you to close it.
- The installer includes the SteamVR driver and registers it automatically. Nothing to copy by hand, and every update replaces the driver too.
- When you open the app, the server starts on its own. The interface is in English and Spanish (
ES / ENswitch at the bottom left).
2. Connect your gear (step 01)
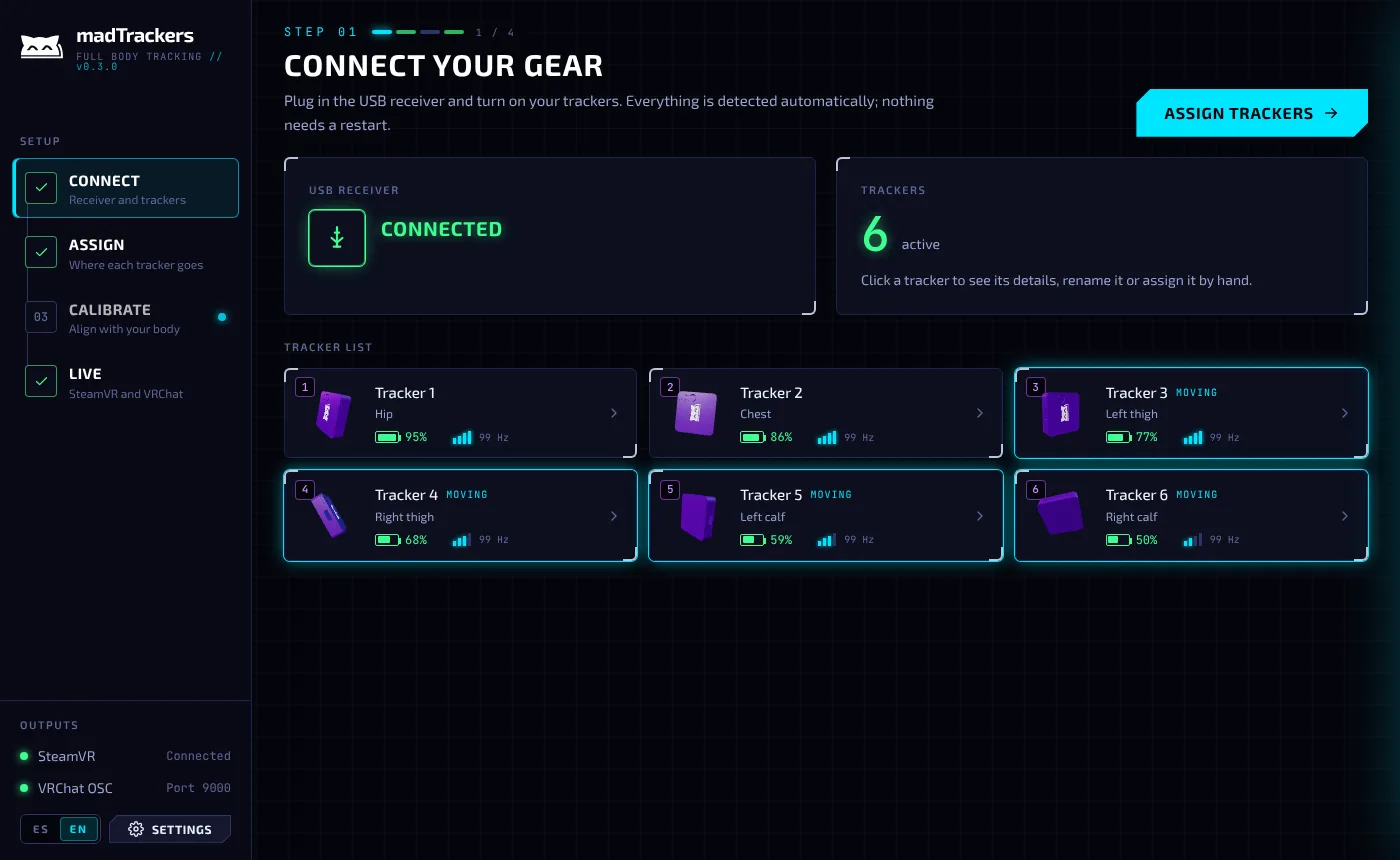
- Plug in the USB receiver included with your madTrackers.
- Open madTrackers Server.
- Turn on the trackers. They show up in the list on their own with battery and signal; no restart needed. You can unplug and replug the receiver at any time.
- If a tracker doesn't show up:
- Check that it has battery.
- Press its button once (reset) until the LED blinks.
3. Tracker LED indicators
- 1 blink: tracker ready and connected.
- 2 blinks: looking for the server.
- 3 blinks: looking for the receiver.
- 5 blinks: general error.
If it doesn't turn on or keeps blinking, connect it via USB to charge it.
- Red LED: connection.
- Blue LED: charging.
4. Assign each tracker (step 02)
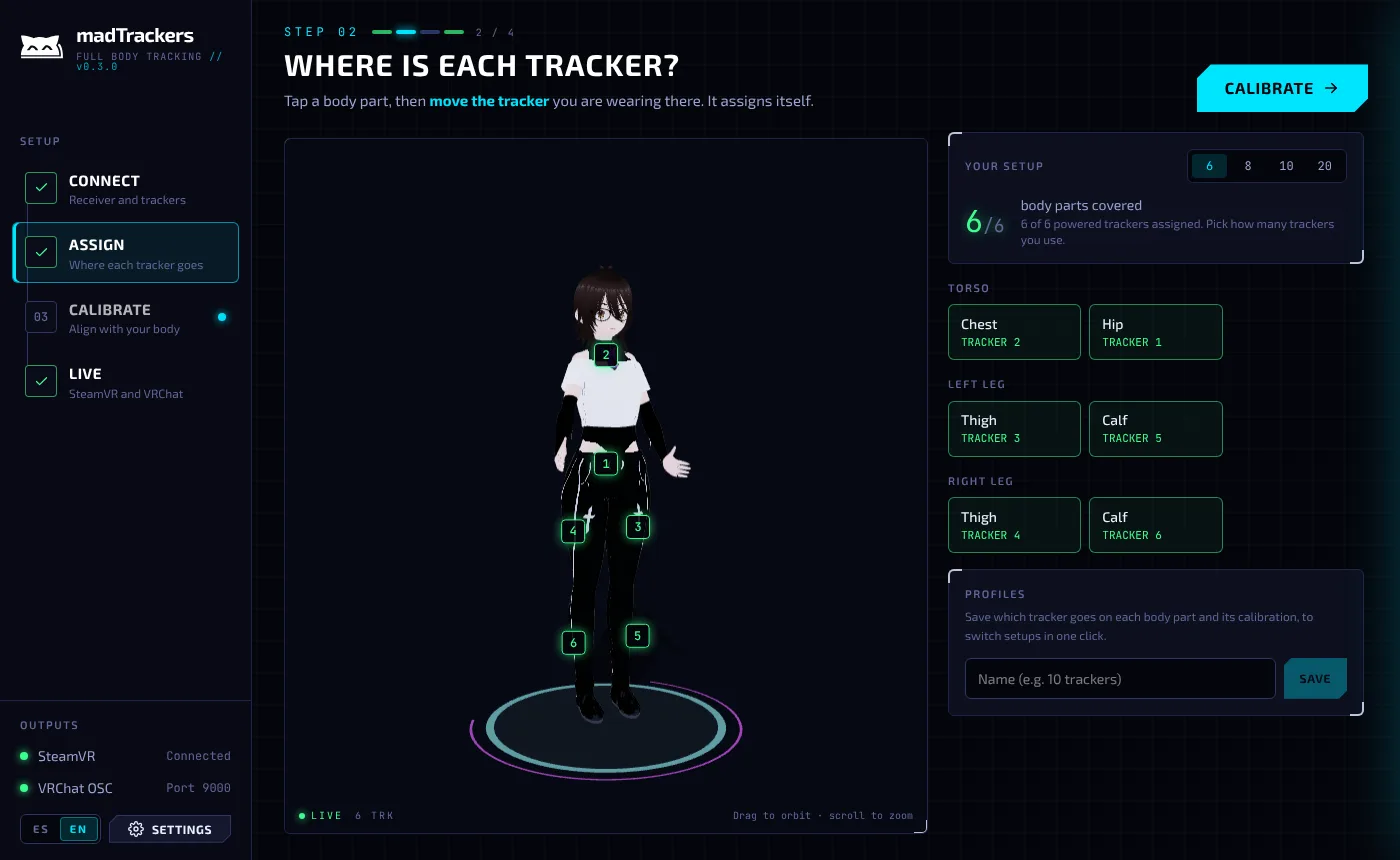
- Choose how many trackers you use (6, 8, 10 or 20).
- Tap a body part on screen and then move the tracker you're wearing there: it assigns itself. You can also pick the part by hand by tapping the tracker.
- If you switch setups often, save a profile with the assignment and calibration.
5. Calibrate your body (step 03)
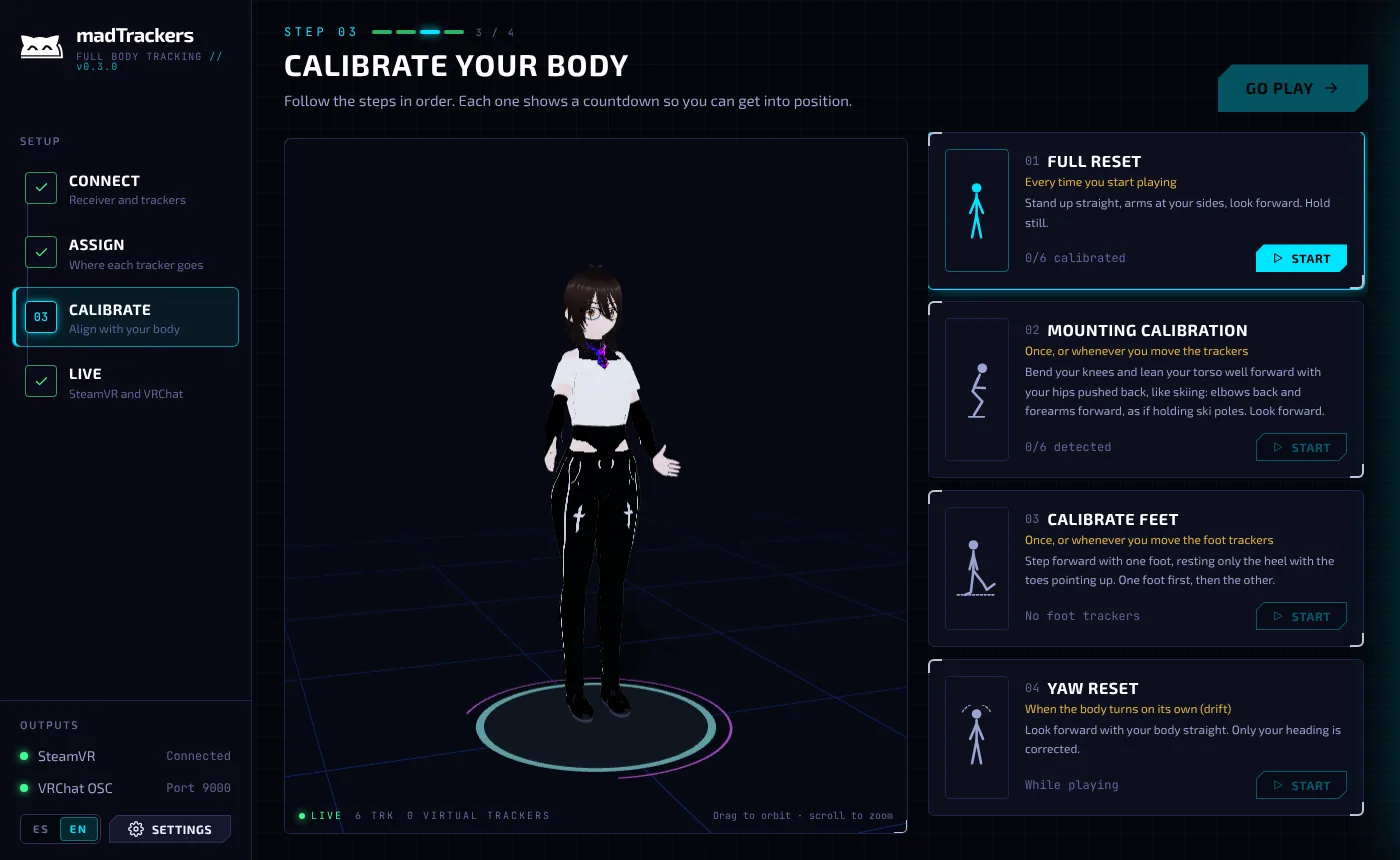
First, set your height in Settings → Body. With SteamVR you can use automatic calibration: it measures the floor with a controller resting on it and your height with the headset on, standing.
Then follow the steps in order; each one has a countdown so you can get into position:
- Full reset (always when you start playing): stand straight, arms at your sides, looking forward, with the headset on if you use SteamVR.
- Mounting calibration (once, or if you move the trackers): ski pose, knees bent and torso leaning forward. It detects which way each tracker faces.
- Feet calibration (only with foot trackers): step forward resting only your heel, toes up, one foot and then the other.
6. Play (step 04)
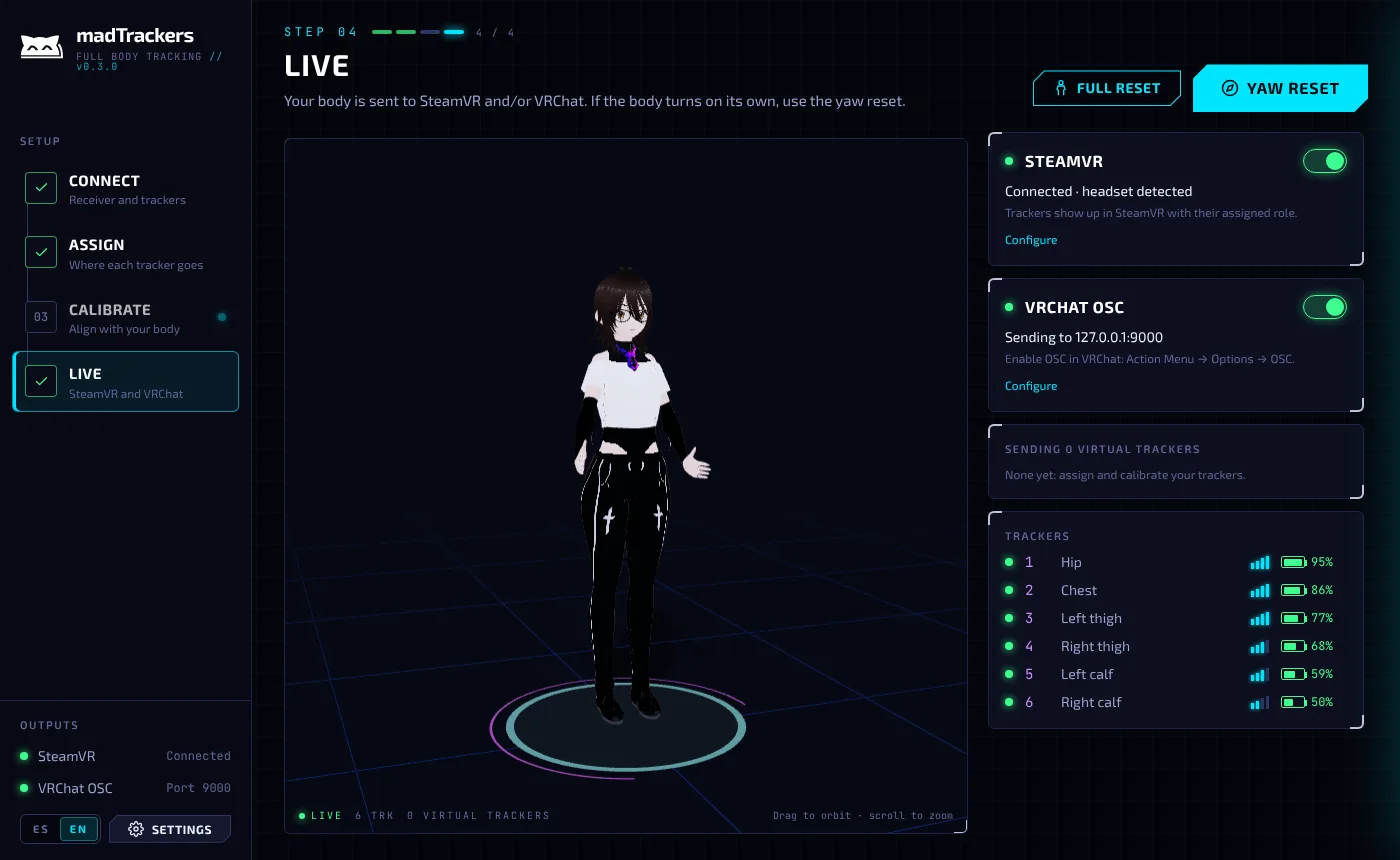
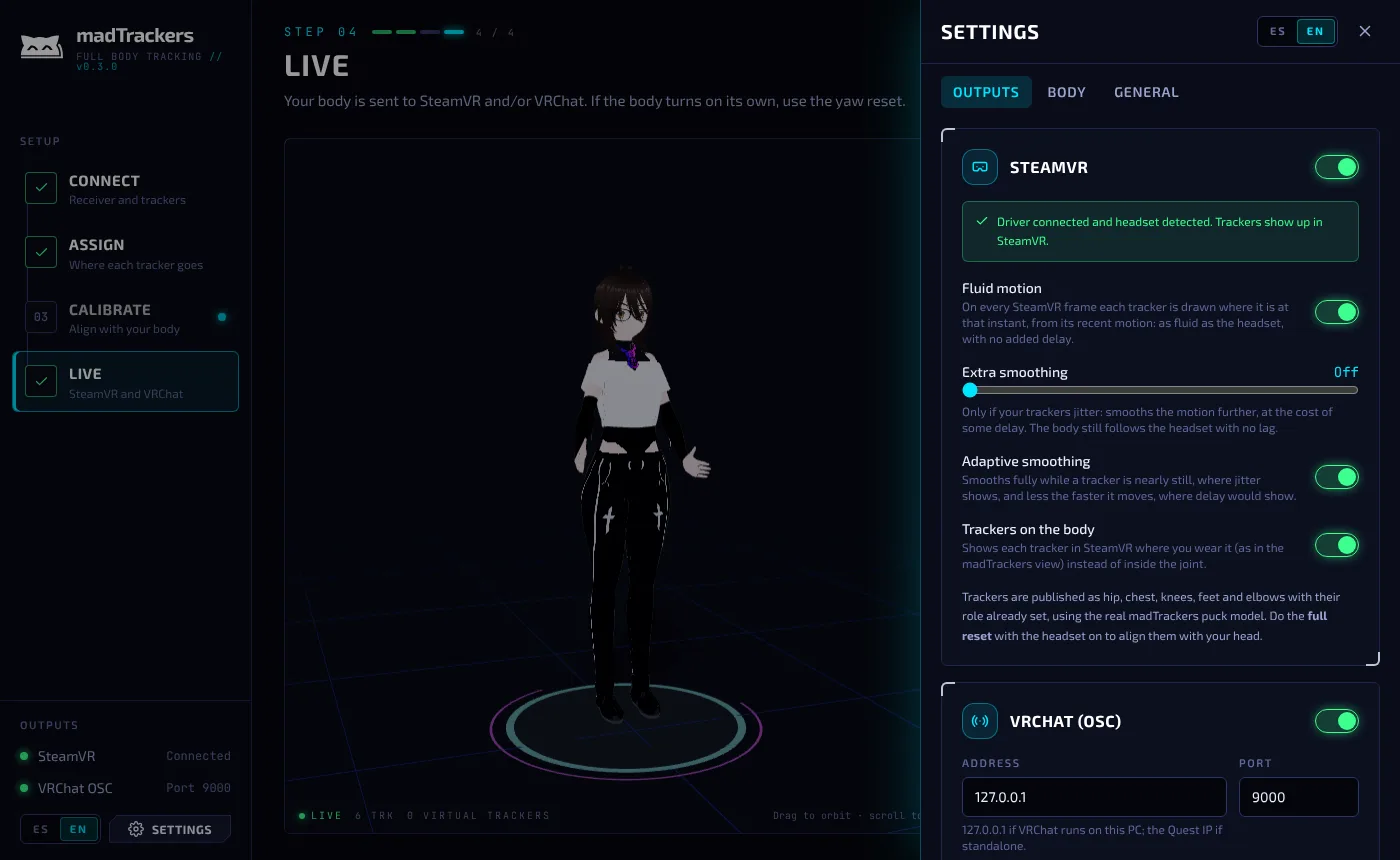
- SteamVR (PC): with the app open, the trackers show up in SteamVR with their role already assigned (hip, chest, knees, feet, elbows). Settings → Outputs → SteamVR should say Driver connected.
- VRChat via OSC (PC or standalone Quest): in VRChat enable OSC in Action Menu → Options → OSC → Enabled. If you play on a Quest, enter the Quest's IP in Settings → Outputs → VRChat.
- In PC VRChat use SteamVR or OSC, not both at the same time.
- If the body slowly turns on its own (drift), use Orientation reset. Automatic drift correction is on by default.
7. Troubleshooting
- SteamVR doesn't show the trackers: close SteamVR, open madTrackers Server and reopen SteamVR. The app checks and repairs the driver every time it starts.
- A tracker says "Needs reset": it came back after losing signal; do an orientation reset.
- Legs or torso look twisted: repeat Mounting calibration and then a full reset.
- Still stuck? Message us on WhatsApp or Discord and we'll help.